
Taking off into the wind is generally preferable whenever practical. However, pilots may need to take off with a crosswind due to runway availability or other circumstances. Understanding proper crosswind takeoff techniques helps pilots maintain directional and lateral control throughout the takeoff roll, lift-off, and initial climb.
Takeoff Roll
The technique used during the initial takeoff roll in a crosswind is generally the same as that used during a normal takeoff, except that the pilot must apply aileron pressure into the crosswind. This raises the aileron on the upwind wing and creates a downward force on that wing to counteract the crosswind’s lifting effect, helping prevent the wing from rising. Because the ailerons and rudder are deflected, drag increases. Therefore, reduced takeoff performance should be expected until the airplane is wings-level in coordinated flight during the climb.
While taxiing into takeoff position, the pilot should check the windsock and other wind direction indicators for a crosswind. If a crosswind is present, the pilot should apply full aileron pressure into the wind while beginning the takeoff roll. This control position should be maintained as the airplane accelerates until the ailerons become effective in controlling the airplane about its longitudinal axis. As the ailerons become effective, the pilot will feel increased pressure on the aileron control.
While holding aileron pressure into the wind, the pilot should use the rudder to maintain a straight takeoff path. [Figure 1]
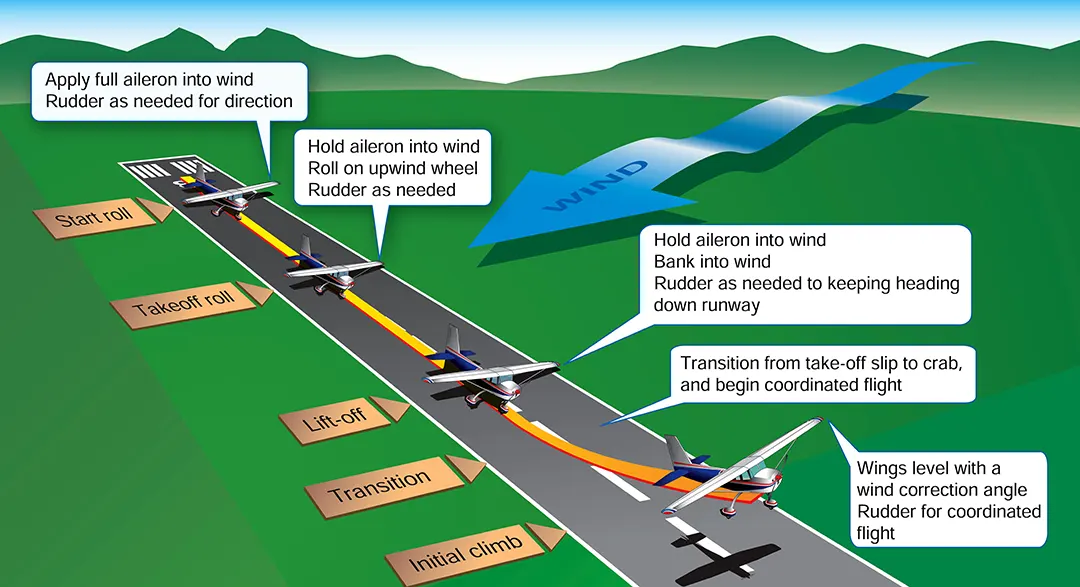
Since the airplane tends to weathervane into the wind while on the ground, the pilot will typically apply downwind rudder pressure. When power is increased for takeoff, the resulting P-factor causes the airplane to yaw to the left. This yaw may be sufficient to counteract the airplane’s tendency to weathervane into the wind during a crosswind from the right, but it may aggravate this tendency during a crosswind from the left. In either case, the pilot should apply rudder pressure in the appropriate direction to keep the airplane rolling straight down the runway.
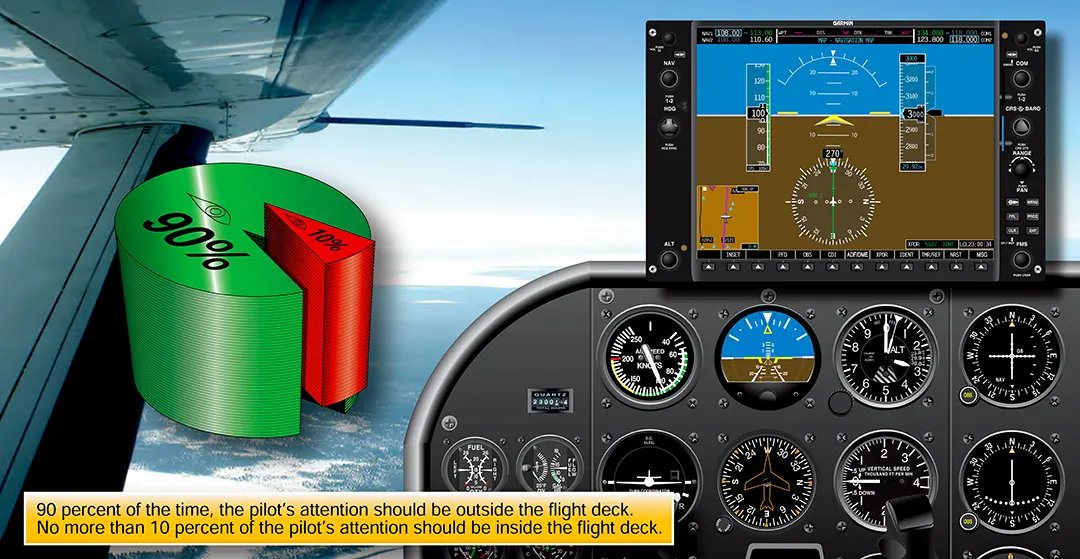
As the airplane’s forward speed increases, the pilot should apply sufficient aileron pressure into the crosswind to keep the wings level. The crosswind effect does not completely disappear; therefore, some aileron pressure must be maintained throughout the takeoff roll. If the upwind wing rises, more wing surface is exposed to the crosswind. This may cause the airplane to lose lateral alignment with the runway centerline and “skip.” [Figure 2] The pilot should use rudder pressure to keep the airplane’s longitudinal axis parallel to the runway centerline.
“Skipping” is usually indicated by a series of very small bounces as the airplane attempts to fly and then settles back onto the runway. During these bounces, the crosswind may also move the airplane sideways, causing the bounces to develop into side-skipping. This side-skipping imposes severe side stresses on the landing gear and may result in structural failure.
During a crosswind takeoff roll, the pilot should hold sufficient aileron pressure into the wind not only to keep the upwind wing from rising, but also to hold that wing down so that the airplane sideslips into the wind enough to counteract drift immediately after lift-off.
Lift-Off
As the nosewheel rises off the runway, the pilot should continue holding aileron pressure into the wind. This may cause the downwind wing to rise and the downwind main wheel to lift off the runway first, with the remainder of the takeoff roll occurring on the upwind main wheel. This is acceptable and preferable to side-skipping.
If a significant crosswind exists, the pilot should keep the main wheels on the ground slightly longer than during a normal takeoff so that a smooth but definite lift-off can be made. This allows the airplane to leave the ground under more positive control and helps it remain airborne while the pilot establishes the proper amount of wind correction. More importantly, this procedure avoids imposing excessive side loads on the landing gear and prevents possible damage that could result if the airplane settles back onto the runway while drifting.
As both main wheels leave the runway, the airplane begins to drift sideways with the wind because ground friction is no longer a factor in preventing lateral movement. To minimize this movement and keep the upwind wing from rising, the pilot should establish and maintain the proper amount of crosswind correction before lift-off by applying aileron pressure into the wind. The pilot should also apply rudder pressure as needed to prevent weathervaning.
Initial Climb
With proper crosswind correction, the airplane can maintain runway alignment while accelerating to takeoff speed and after becoming airborne. As the airplane accelerates, the effectiveness of the ailerons increases. The upwind aileron produces a greater downward force, helping counteract the crosswind’s effect. The control yoke, initially turned into the wind, can be relaxed as necessary to maintain the desired lateral control.
As the airplane becomes airborne, the upwind wing may tend to be lower than the other wing, requiring coordinated rudder input to maintain runway alignment. This may initially cause the airplane to sideslip. As the airplane establishes its climb, the nose should be turned into the wind to offset the crosswind, the wings brought level, and the rudder adjusted to maintain the desired runway alignment through a crab. [Figure 3]
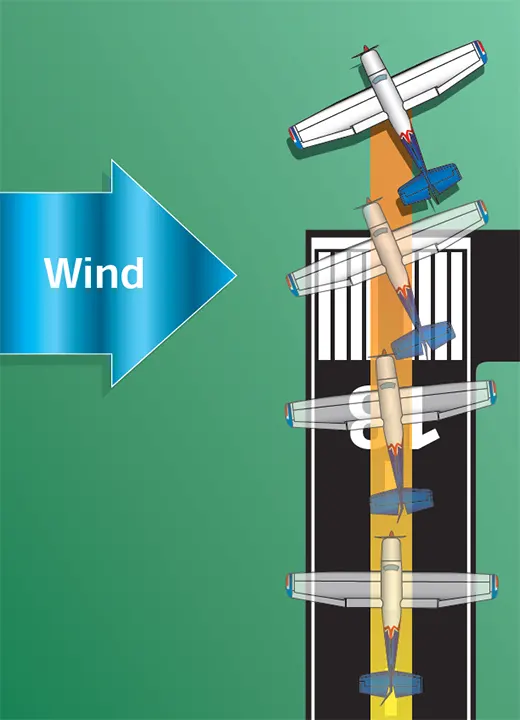
Firm and positive rudder use may be required to keep the airplane pointed down the runway or parallel to its centerline. During the initial climb, maintaining runway alignment and staying over the runway and its extended centerline are important. Because crosswind strength may vary markedly within a few hundred feet of the ground, the pilot should check the ground track frequently and adjust the wind correction angle as necessary. The remainder of the climb technique is the same as that used for normal takeoffs and climbs.
Common Errors
The most common errors made while performing crosswind takeoffs include:
- Failure to review AFM/POH performance information and charts before takeoff.
- Failure to adequately clear the area before taxiing onto the active runway.
- Using less than full aileron pressure into the wind initially during the takeoff roll.
- Using aileron control mechanically rather than judging the airplane’s lateral position on the runway from visual clues and applying sufficient aileron to keep the airplane centered.
- Side-skipping due to improper aileron application.
- Inadequate rudder control to maintain the airplane parallel to the runway centerline and pointed straight ahead using visual references.
- Excessive aileron input during the latter stage of the takeoff roll, resulting in a steep bank into the wind at lift-off.
- Inadequate drift correction after lift-off.